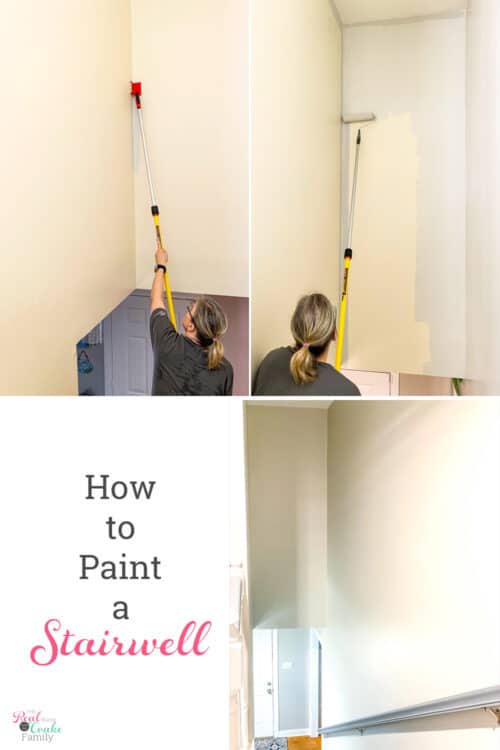
Painting a high stairwell can seem daunting. It’s a task that requires careful planning and the right tools.
But with some guidance, it is achievable. A high stairwell can make a home feel spacious and grand. But, this space can also be tricky to paint. The height and angles present unique challenges. Whether you’re refreshing your walls or changing colors, you want a smooth and safe process.
This blog will provide tips and steps to help you tackle this project. You’ll learn how to prepare your space, choose the right equipment, and apply paint efficiently. Let’s make your stairwell look stunning with a fresh coat of paint. Ready to dive in? Let’s get started!

Credit: aturtleslifeforme.com
Preparation
Proper preparation is crucial before painting a high stairwell. It ensures a smooth and safe process. This involves gathering the right safety gear, collecting necessary supplies, and cleaning the surfaces. Let’s break it down step by step.
Safety Gear
Safety is paramount. Ensure you have the right gear before you start.
- Helmet: Protects your head from potential falls.
- Gloves: Keeps your hands safe from paint and chemicals.
- Goggles: Shields your eyes from paint splatters.
- Non-slip shoes: Essential for stability on ladders.
Gathering Supplies
Having all supplies ready will make the job smoother. Gather these items:
- Paint: Choose the right type and color for your walls.
- Brushes and Rollers: Different sizes for edges and large areas.
- Painter’s Tape: To protect edges and trims.
- Drop Cloths: To cover floors and furniture.
- Ladder: A sturdy, extendable ladder for high areas.
Surface Cleaning
Cleaning the surface is a must before painting. A clean surface ensures better paint adhesion.
- Dust the walls with a dry cloth.
- Use a mild detergent solution to clean stains.
- Rinse with clean water and let the wall dry.
Make sure the wall is completely dry before you start painting.
Choosing Paint
Painting a high stairwell is a challenging task. Choosing the right paint can make the job easier and the results more stunning. The two main factors to consider are the paint type and color selection. Both are equally important for a great finish.
Paint Types
There are different types of paint available. Each type offers unique benefits. Here are the most common options:
- Latex Paint: Easy to clean and dries quickly.
- Oil-Based Paint: Durable and smooth finish.
- Eggshell Finish: Slight sheen, hides imperfections.
- Satin Finish: Slightly more sheen than eggshell.
Choose latex paint for ease of use. Oil-based paints are great for durability. The finish you choose will depend on your preference for sheen and ease of cleaning.
Color Selection
Choosing the right color is essential. It impacts the look and feel of your stairwell. Here are some tips:
- Neutral Colors: Make the space look bigger and cleaner.
- Bold Colors: Add personality and make a statement.
- Light Colors: Brighten up dark spaces.
- Dark Colors: Create a cozy, intimate feel.
Neutral colors are always safe. Light colors open up the space. Bold colors are great for making a statement. Dark colors create a warm, inviting atmosphere.
Consider the amount of natural light in your stairwell. More light allows for bolder color choices. Less light means lighter colors can help brighten the area.
Setting Up Scaffolding
Painting a high stairwell can be a daunting task. Scaffolding helps make the job safer and easier. Setting it up correctly is crucial. Let’s explore the different scaffolding types, assembly tips, and essential safety measures.
Scaffolding Types
There are various types of scaffolding available. Each serves a different purpose. Here are the most common types:
- Frame Scaffolding: Easy to assemble and use. Ideal for most painting tasks.
- Rolling Scaffolding: Equipped with wheels. Allows easy movement.
- Suspended Scaffolding: Hangs from the top. Suitable for very high areas.
- Single Scaffolding: Used mainly for brick masonry work. Not commonly used for painting stairwells.
Assembly Tips
Proper assembly is key to a safe and stable scaffolding setup. Follow these tips:
- Read the manual: Always read the manufacturer’s instructions. Each scaffolding type may have specific guidelines.
- Select a flat surface: Ensure the ground is level. This provides a stable base.
- Check all parts: Inspect for any damages or missing parts before assembly.
- Use the right tools: Have all necessary tools handy. This includes wrenches and safety pins.
- Secure the base: Anchor the scaffolding to prevent tipping.
Safety Measures
Safety should always be your top priority. Here are some critical measures:
- Wear protective gear: Helmets, gloves, and non-slip shoes are essential.
- Check weight limits: Do not exceed the scaffolding’s weight capacity.
- Use guardrails: Install guardrails to prevent falls.
- Inspect regularly: Check the stability and condition of the scaffolding daily.
- Avoid bad weather: Do not use scaffolding in strong winds or rain.
By following these guidelines, you can safely and effectively paint your high stairwell. Proper scaffolding setup ensures a smooth and safe painting experience.

Credit: realcreativerealorganized.com
Priming The Surface
Painting a high stairwell can be a daunting task. The first step is crucial. Priming the surface ensures the paint adheres well. It also provides a smooth finish. Below we discuss the types of primers and how to apply them.
Primer Types
There are several types of primers available. Each type serves a different purpose. Choose the right one based on your wall’s condition.
| Primer Type | Best For |
|---|---|
| Latex Primer | Drywall and softwood |
| Oil-Based Primer | Wood and metal |
| Shellac Primer | Stains and odors |
Application Techniques
Applying the primer correctly is just as important. Follow these steps for a smooth application.
- Clean the surface. Remove dust and dirt.
- Use painter’s tape to protect edges.
- Stir the primer well.
- Start with a brush for edges and corners.
- Use a roller for larger areas.
- Apply an even coat. Avoid drips.
- Let the primer dry completely before painting.
Using the right techniques makes a big difference. Your paint will look better and last longer.
Painting Techniques
Painting a high stairwell can seem challenging. But with the right techniques, it can be manageable and even enjoyable. This section will guide you through various painting techniques to ensure a smooth and professional finish.
Brush Vs. Roller
Choosing between a brush and a roller depends on your needs. Brushes are great for detailed work. They allow you to paint edges and corners precisely. Rollers cover larger areas quickly. They provide an even coat and are ideal for walls and ceilings. For a high stairwell, use both tools for the best results.
Cutting In
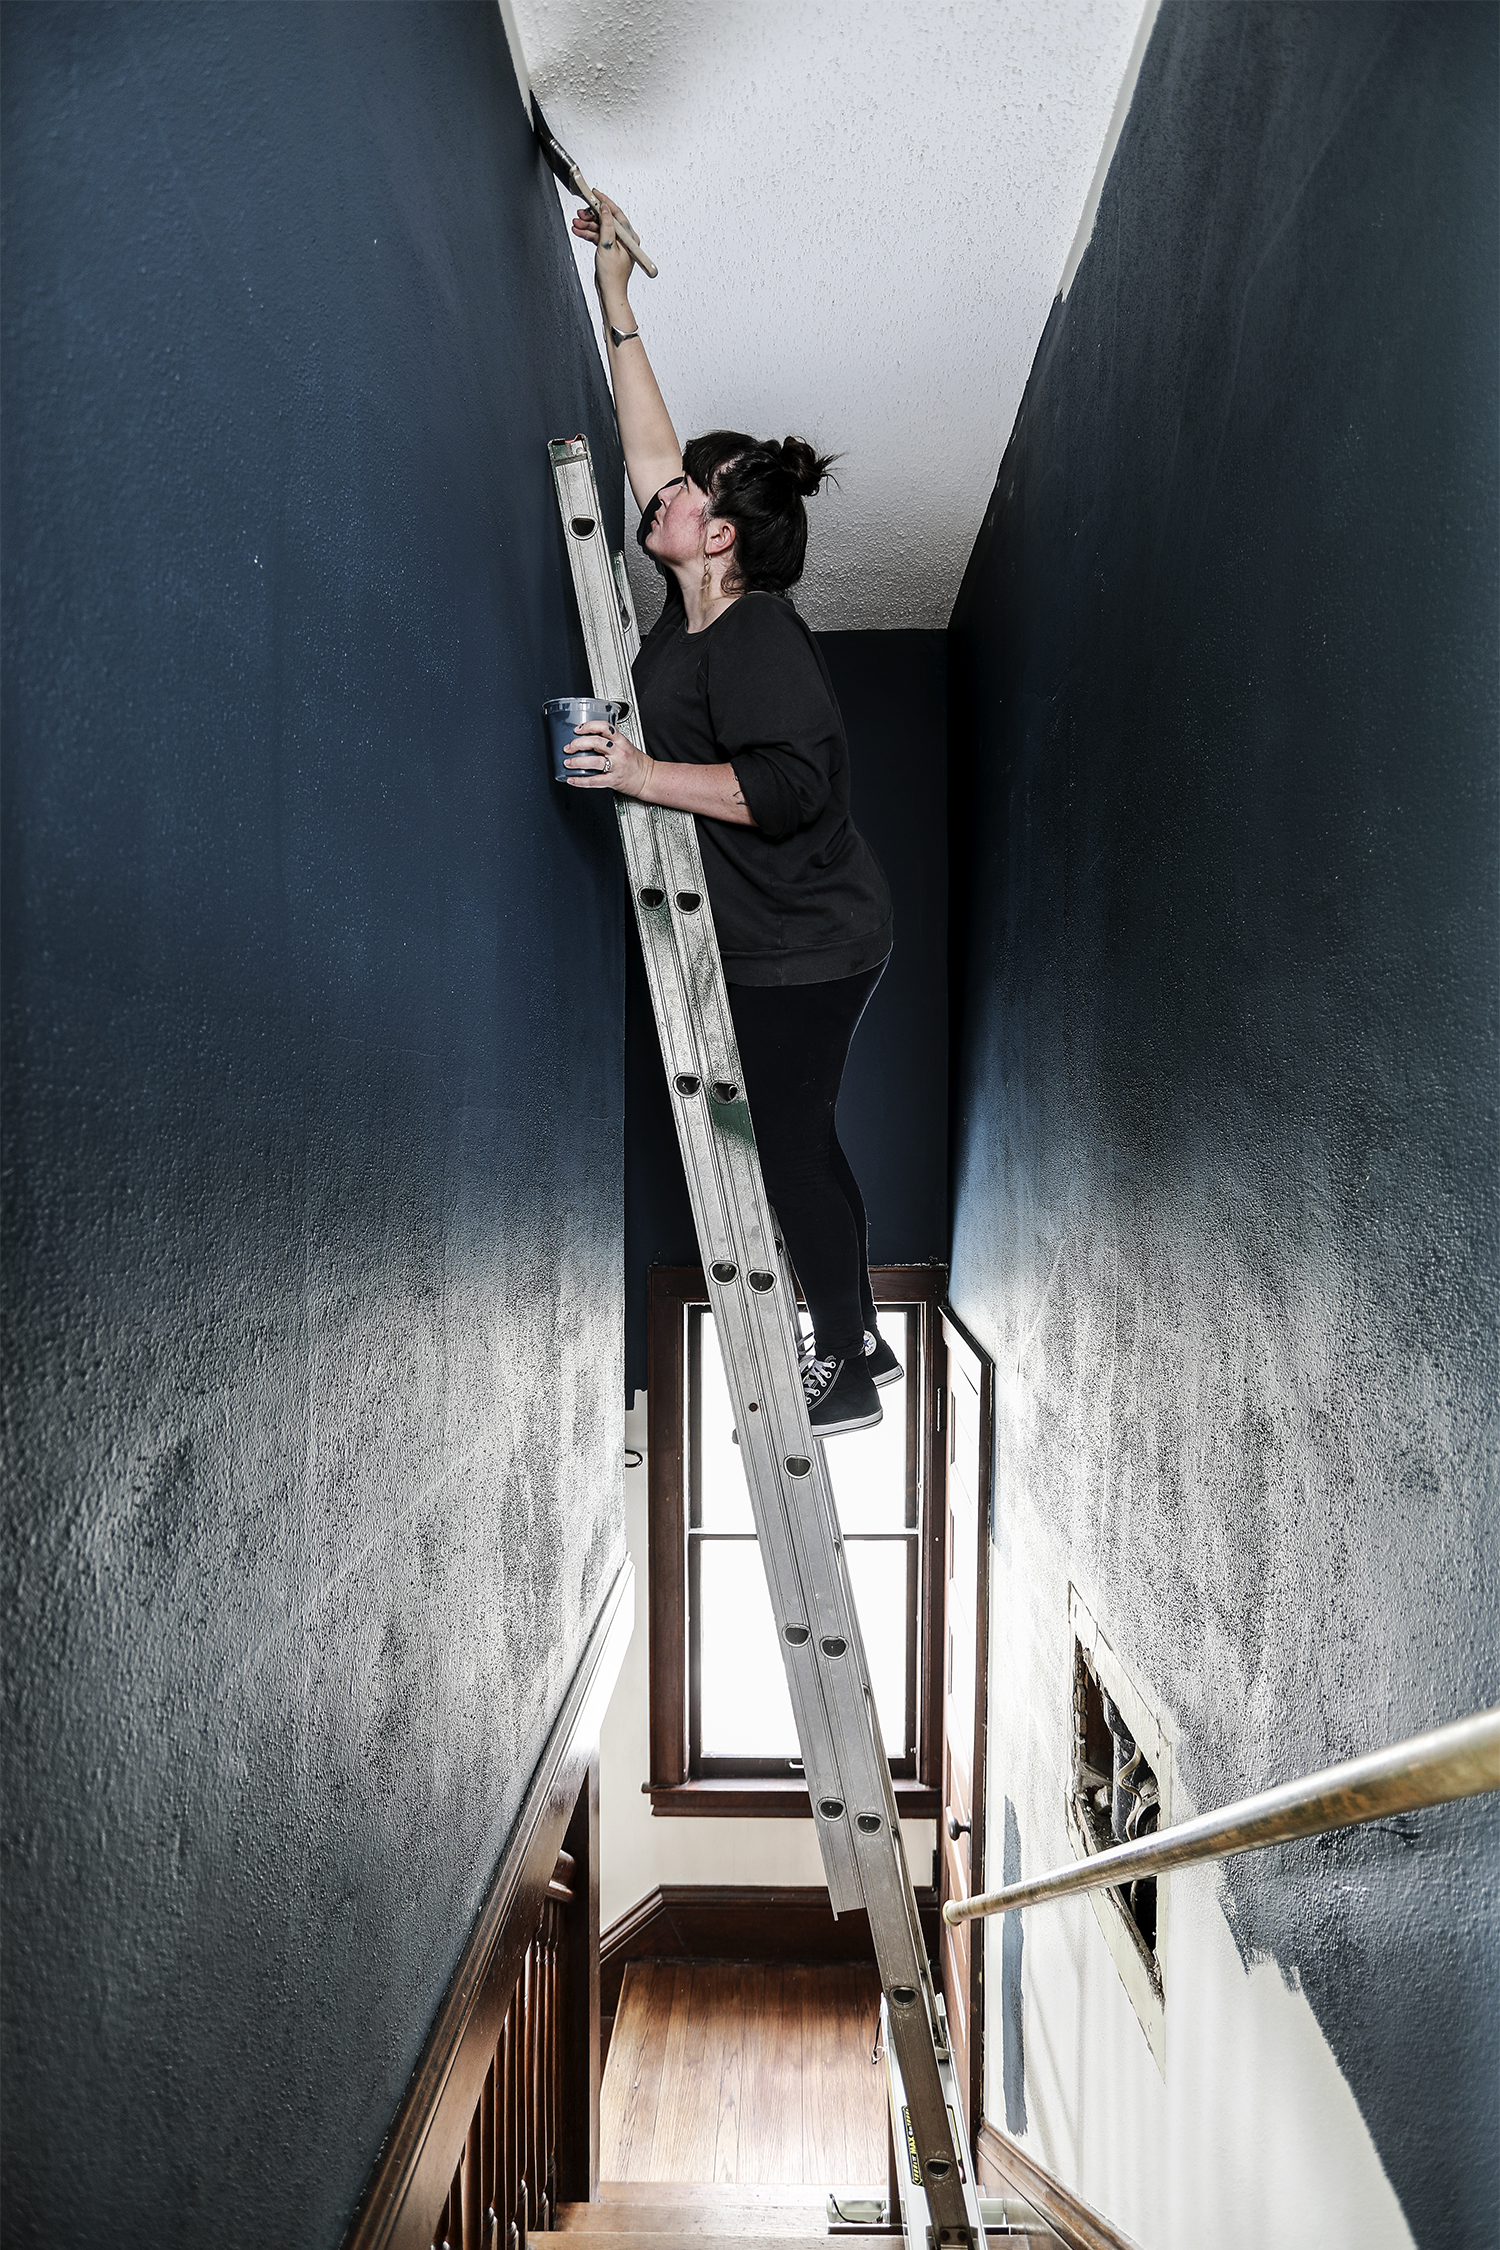
Cutting in involves painting the edges and corners before rolling the main surfaces. Use a good-quality brush for this task. Start by painting a straight line along the edges. This creates a border. It also helps prevent the roller from touching the adjacent walls or ceiling. It takes patience but ensures a clean, professional finish.
Even Coating
An even coating is crucial for a professional look. Dip the roller in the paint tray. Roll it back and forth to ensure it’s evenly loaded. Start painting in a W pattern. This technique distributes the paint evenly. Overlap each stroke slightly to avoid streaks. For best results, apply two coats of paint.

Credit: www.deucecitieshenhouse.com
Dealing With Edges And Corners
Painting a high stairwell can be challenging. Dealing with edges and corners requires special attention. These areas need careful preparation and precise painting techniques.
Angle Brushes
Angle brushes are your best friend for corners. They allow for precise control. The angled bristles help reach tight spots. Dip the brush lightly into the paint. Start from the corner and paint outwards. Use steady, even strokes. This ensures a smooth finish.
Taping Tips
Proper taping is essential for clean edges. Use painter’s tape to cover areas you don’t want painted. Press the tape firmly to avoid paint seeping through. Tape along the trim, baseboards, and ceilings. Remove the tape while the paint is still wet. This prevents peeling and ensures sharp lines.
Drying And Second Coat
After applying the first coat of paint to your high stairwell, it’s crucial to allow it to dry thoroughly before moving on to the second coat. This step ensures a smooth, even finish and enhances the overall durability of your paint job. Let’s delve into the specifics of drying time and applying the second coat.
Drying Time
The drying time for paint can vary based on several factors. These include the type of paint used, humidity levels, and temperature. Typically, latex paint dries faster than oil-based paint.
- Latex Paint: Touch dry in 1-2 hours.
- Oil-based Paint: Touch dry in 6-8 hours.
Ensure the first coat is dry to the touch before proceeding. This can prevent smudging and ensure an even second coat. For optimal results, wait at least 24 hours.
Applying Second Coat
Once the first coat is completely dry, it’s time to apply the second coat. This will enhance the color and provide better coverage.
- Use a clean brush or roller.
- Start from the top and work your way down.
- Apply in thin, even layers.
- Let the second coat dry completely before using the stairwell.
Applying the second coat evenly is crucial. Take your time to avoid drips and streaks.
Clean-up
Clean-up is a crucial part of any painting project. Especially after painting a high stairwell. Ensuring your tools and materials are properly cleaned and stored will save you time and money on your next project. This section covers essential steps to clean your brushes and rollers, dispose of paint properly, and store leftover paint.
Cleaning Brushes And Rollers
Start by removing excess paint from your brushes and rollers. Use a putty knife or a brush comb. Rinse them under warm running water. Use soap for water-based paints. Use paint thinner for oil-based paints. Work the cleaner into the bristles or roller nap. Rinse until the water or solvent runs clear. Shake out excess water and let them air dry. Store them in a clean, dry place.
Disposing Of Paint Properly
Never pour leftover paint down the drain. It can harm the environment. Instead, let the paint dry out completely. Use a paint hardener or kitty litter to speed up the process. Once dry, you can dispose of it with your regular trash. For larger amounts of leftover paint, check for local hazardous waste disposal sites. Some areas offer special programs for paint disposal.
Storing Leftover Paint
Save leftover paint for touch-ups. Pour the paint into a smaller, airtight container. Label it with the date and color name. Store it in a cool, dry place. Avoid extreme temperatures. This will keep the paint fresh for future use. Make sure the lid is sealed tightly to prevent drying out.
Frequently Asked Questions
How Do You Paint A High Stairwell Safely?
To paint a high stairwell safely, use a sturdy ladder or scaffold. Ensure you have stable footing. Always have a partner to assist you. Use extension poles for hard-to-reach areas.
What Tools Are Needed To Paint A High Stairwell?
You need a ladder or scaffold, extension poles, paint rollers, brushes, painter’s tape, drop cloths, and safety gear. Choose high-quality tools for a professional finish.
How Do You Prepare A High Stairwell For Painting?
Clear the area of furniture and cover floors with drop cloths. Clean the walls to remove dust and grime. Use painter’s tape to protect trim and edges.
What Type Of Paint Is Best For High Stairwells?
Use high-quality, durable paint with a semi-gloss or satin finish. These finishes are easier to clean and resist stains. Choose a paint that adheres well to vertical surfaces.
Conclusion
Painting a high stairwell can seem challenging. But with the right tools, it’s doable. Safety should always come first. Use sturdy ladders and secure your workspace. Plan your steps carefully and take your time. Preparing your space and using the right materials will ensure a professional finish.
Practice patience and precision. Now, you can confidently tackle this project. Enjoy your beautifully painted stairwell!


