Setting up scaffolding is essential for many construction projects. It ensures safety and efficiency.
Scaffolding provides a stable platform for workers to perform tasks at heights. Proper setup is crucial to prevent accidents and injuries. In this guide, we will walk you through the process of setting up scaffolding step-by-step. Whether you are a DIY enthusiast or a professional contractor, understanding the basics of scaffold assembly can save time and enhance safety.
From selecting the right type of scaffolding to ensuring secure connections, this tutorial covers all the necessary details. Ready to learn how to set up scaffolding safely and effectively? Let’s get started!

Credit: www.youtube.com
Choosing The Right Scaffolding
Choosing the right scaffolding is crucial for safety and efficiency. Understanding the types and materials available can help make informed decisions. This section breaks down the key aspects to consider.
Types Of Scaffolding
Several types of scaffolding are available, each suited for different tasks. Frame scaffolding is common for general construction. It’s easy to set up and flexible for various heights. System scaffolding provides a modular approach. It’s ideal for complex structures and offers more stability. Mobile scaffolding is great for projects requiring frequent movement. It has wheels, making it easy to relocate.
Material Selection
Scaffolding materials vary based on the project’s needs. Steel scaffolding is strong and durable. It’s perfect for heavy-duty tasks. Aluminum scaffolding is lightweight and easy to transport. It’s suitable for smaller projects and quick setups. Wooden scaffolding is traditional but less common today. It’s often used for smaller or indoor tasks. Each material has its pros and cons. Consider the project’s demands and choose accordingly.
Inspecting The Site
Inspecting the site is crucial before setting up scaffolding. This step ensures safety and compliance with regulations. Proper inspection helps prevent accidents. It also ensures the scaffolding stands strong and stable. A thorough inspection identifies potential issues early. This can save time and reduce costs. Below are key aspects to consider during site inspection.
Assessing Ground Conditions
Check the ground for stability. Soft or uneven ground is risky. It can cause scaffolding to lean or collapse. Look for signs of previous disturbances. This includes recent digging or flooding. Ensure the ground is compact and firm. Use base plates on soft surfaces. They help distribute the weight evenly. Consider weather conditions. Rain can soften the ground quickly.
Identifying Hazards
Identify potential hazards around the site. Overhead power lines are dangerous. Keep scaffolding away from them. Look for loose debris on the site. This can cause slips and falls. Ensure there are no obstructions. These include trees or buildings. They can interfere with scaffolding setup. Assess the site for vehicle traffic. Vehicles can pose a collision risk. Mark the scaffold area clearly. Use cones or barriers for safety.
Preparing The Foundation
Setting up scaffolding requires a solid base. Ensure the ground is level and firm for stability. Use base plates or mud sills for a secure foundation.
Setting up scaffolding can seem intimidating, but preparing the foundation is a crucial first step that can make the process smoother and safer. Ensuring that the base is solid and stable will help prevent accidents and provide a secure platform for your work. Let’s dive into how you can prepare the foundation effectively.Leveling The Ground
Start by inspecting the area where you plan to set up the scaffolding. The ground should be firm and free of debris. Soft or uneven ground can lead to instability. Use a spirit level to check the ground. If you find uneven spots, fill them with soil or gravel to create a flat surface. This step is vital because an uneven base can cause the scaffolding to tilt or collapse. Consider placing base plates or mud sills under the scaffolding feet. These distribute the load evenly and add stability, especially on softer ground.Anchoring Techniques
Anchoring the scaffolding is essential for preventing it from tipping over. One effective method is using scaffold anchors or ties that attach the scaffolding to a stable structure like a building. Make sure you use the correct type of anchor for your specific scaffolding system. Check the manufacturer’s guidelines to ensure you’re using the right materials. Always double-check the anchors once installed. Give them a good tug to confirm they’re secure. You don’t want any surprises while you’re working at height. Taking these steps to prepare the foundation can make a world of difference in your scaffolding setup. Have you ever had an experience where you skipped a step and paid the price later? It’s those moments that teach us the importance of doing things right from the start. Remember, a strong foundation isn’t just a starting point—it’s the bedrock of a safe and successful project.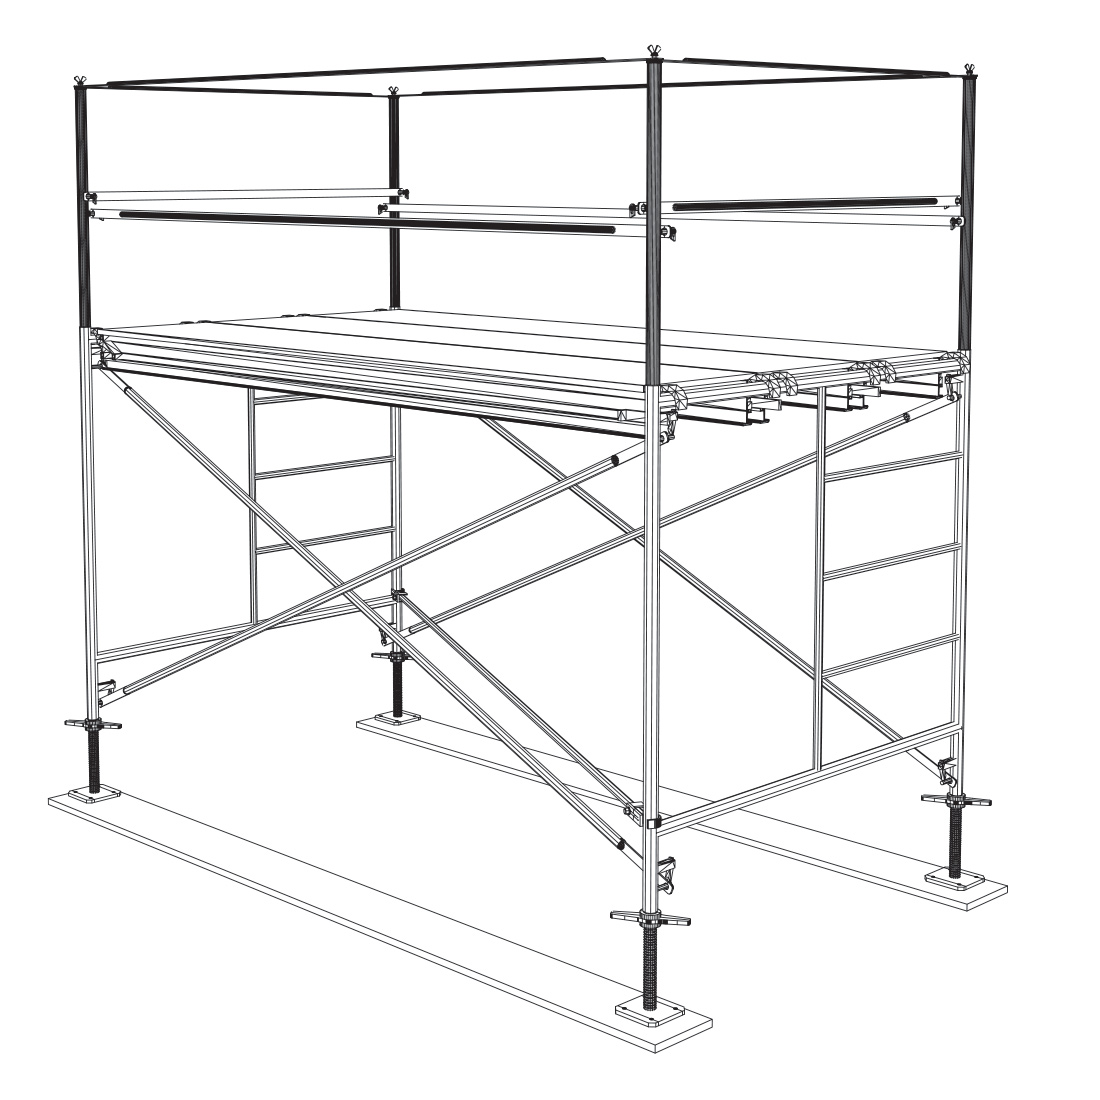
Credit: www.metaltech.co
Assembling The Scaffolding
Setting up scaffolding involves assembling metal tubes and boards to create a safe working platform. Follow safety guidelines, secure all connections, and ensure stability before use. Proper assembly is key for a safe and effective work environment.
Assembling scaffolding might seem daunting, but with the right guidance, it becomes a manageable task. Whether you’re a DIY enthusiast or a professional, understanding how to properly assemble scaffolding is crucial for safety and efficiency. Let’s dive into the essentials of putting it all together, ensuring your project stands tall and secure. ###Component Identification
Begin by identifying each component. Familiarize yourself with the parts, such as frames, cross braces, base plates, and planks. Imagine starting a puzzle without knowing what pieces you have. It’s the same with scaffolding. Knowing each part helps you avoid mistakes and ensures you have everything you need. Labeling each component as you unpack it can save time. It prevents confusion, especially if you’re working with multiple sets or types of scaffolding. ###Step-by-step Assembly
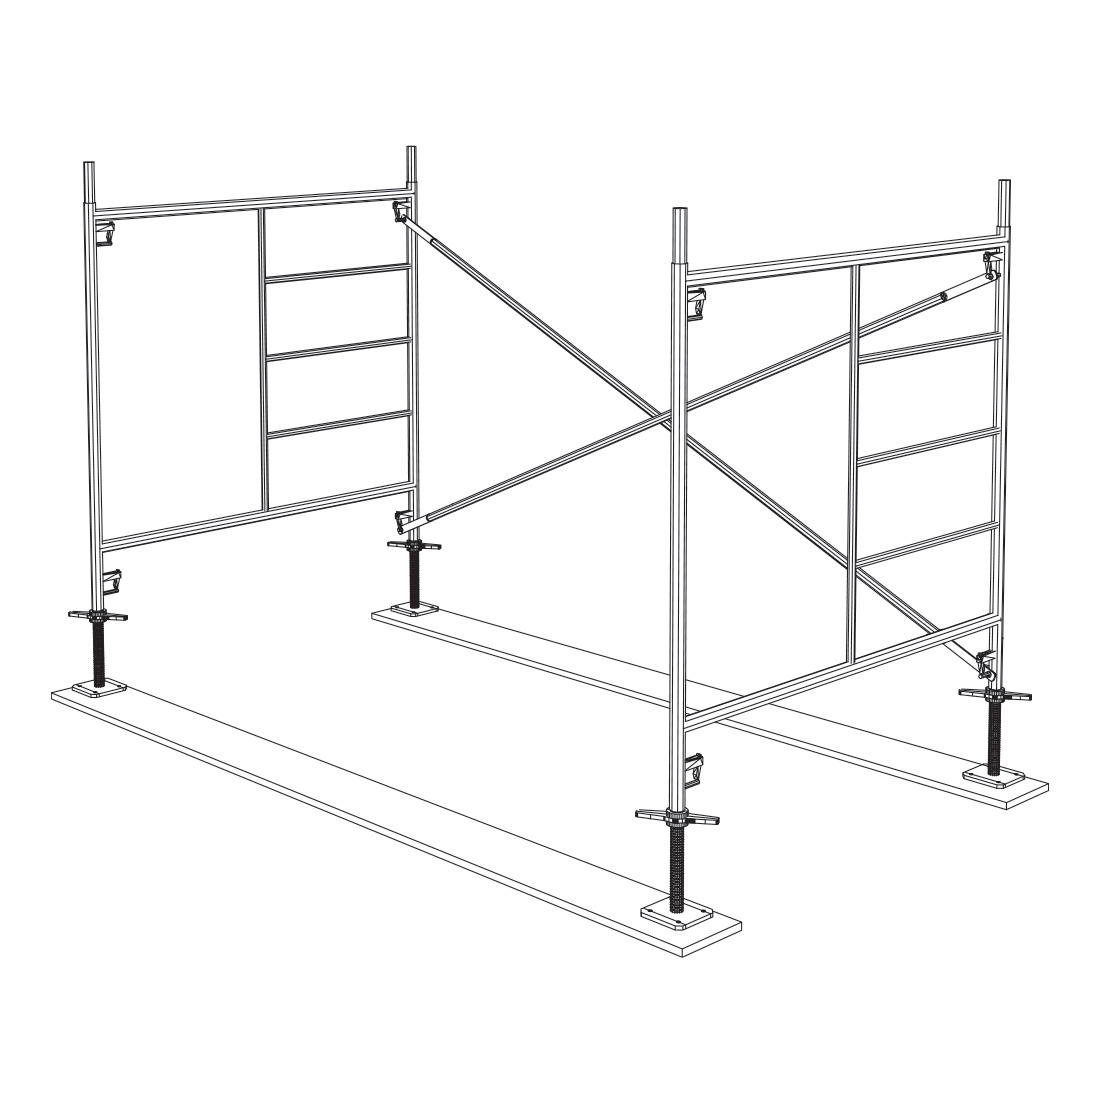
1. Prepare the Base Ensure the ground is level and stable. Place base plates or casters on the ground to form a sturdy foundation. Think of this as laying the groundwork for your project’s success. 2. Build the Frame Attach the frames to the base plates. Use cross braces to connect frames, creating the basic structure. It’s like erecting a skeleton that supports your entire setup. 3. Secure the Structure Double-check each connection. Tighten all clamps and ensure no loose ends. Imagine this as checking your shoelaces before a run – everything needs to be tight and secure. 4. Add Platforms Place the planks across the frames to form the working surface. Ensure they are locked in place. Picture this as laying the floors of a house – they must be secure to support your activities. 5. Install Guardrails Attach guardrails to prevent falls. Safety should never be an afterthought. Consider this your safety net, protecting you from potential hazards. Have you ever considered how much easier it becomes once you break down the process into smaller steps? Each stage in assembling scaffolding adds to a robust and reliable setup. By following these steps meticulously, you not only ensure safety but also improve your efficiency. Remember, every great structure starts with a solid foundation and careful assembly. Whether you’re reaching new heights in your home renovation or a construction project, mastering scaffold assembly is key. Are you ready to build confidently?Ensuring Structural Stability
Ensuring structural stability is vital when setting up scaffolding. Stability ensures safety for workers and the public. Proper setup prevents accidents and structural failures. Understanding how to maintain stability is crucial for successful construction projects.
Load Capacity Considerations
Assess the load capacity of the scaffolding. Each scaffold has a specific weight limit. Know the maximum weight it can hold. Include workers, tools, and materials in the calculation. Overloading can lead to collapse or accidents. Always follow the manufacturer’s guidelines for load limits.
Bracing And Tying
Bracing and tying provide additional support. They prevent scaffolding from tipping or swaying. Use diagonal braces for extra strength. Secure the scaffolding to a stable structure. Tying ensures it stays in place during use. Regularly check the braces and ties for security.
Implementing Safety Measures
Setting up scaffolding safely is crucial for worker protection. Safety measures prevent accidents and ensure a secure work environment. Always prioritize safety when assembling scaffolding.
Guardrails And Toe Boards
Guardrails prevent falls from scaffolding. Install them on all open sides. Ensure they are sturdy and at the correct height. Toe boards stop tools and materials from falling. Attach them securely at the base of the guardrails.
Safety Gear For Workers
Workers need proper safety gear. Helmets protect their heads from falling objects. Non-slip boots provide stability on wet surfaces. Harnesses are essential at high elevations. Equip workers with high-visibility vests for easy identification.
Conducting Regular Inspections
Ensuring the safety and stability of scaffolding is crucial for any construction project. Regular inspections play a vital role in maintaining the scaffolding’s reliability. They help you identify potential issues before they become serious hazards. By making inspections a routine part of your process, you can protect your team and keep your project running smoothly.
Daily Checklist
Creating a daily checklist is a practical way to keep inspections consistent. This checklist should cover essential aspects like checking all connections and joints for tightness and ensuring all planks are secure. Look for signs of rust or damage on metal parts. Use a simple list format to make it easy for workers to follow.
Think about it this way: would you drive a car without checking the brakes first? Treat your scaffolding the same way. A quick daily look can prevent accidents and costly delays. Encourage your team to treat this checklist as a non-negotiable part of the workday.
Addressing Wear And Tear
Wear and tear are inevitable, but ignoring them can lead to dangerous situations. Regular inspections help you spot these issues early. Focus on areas that experience the most stress, like joints and beams. Look for cracks, bends, or any signs of weakening.
If you notice any wear and tear, address it immediately. Replace damaged parts with high-quality materials. Consider using reinforced components for areas that consistently show wear. Have you ever ignored a minor issue, only for it to become a major problem later? Avoid that mistake with scaffolding.
Scaffolding inspections aren’t just about checking off boxes. They are about ensuring the safety and efficiency of your project. How do you ensure your inspections are thorough? By engaging your team in the process and prioritizing safety above all else.
Dismantling The Scaffolding
Once the project is complete, dismantling the scaffolding is crucial. Ensuring a safe and efficient process prevents accidents and extends the lifespan of equipment. Proper disassembly is as essential as setting it up. Follow these practices to dismantle scaffolding safely.
Safe Disassembly Practices
Start from the top tier, moving downward in sequence. Wear safety gear like gloves and helmets. Avoid rushing; take your time to ensure stability. Keep tools organized to prevent misplacement. Use a checklist to track each component. Ensure all team members know the plan.
Cleaning And Storage
Thoroughly clean each piece before storage. Remove dirt and debris with mild detergent. Inspect parts for damage during cleaning. Dry components completely to prevent rust. Store scaffolding in a dry, cool place. Organize parts to ease future assembly. Label pieces for quick identification. Use covers to protect from dust.

Credit: jackpixleysweeps.com
Frequently Asked Questions
How To Set Up Scaffolding For Beginners?
Begin by selecting a stable, level surface. Assemble the base securely, ensuring all components lock. Attach vertical frames and guardrails. Use a spirit level to check alignment. Secure platforms firmly, ensuring even spacing. Double-check all connections and inspect for safety.
Always follow manufacturer guidelines and local regulations.
What Is The 3 To 1 Rule For Scaffolding?
The 3 to 1 rule for scaffolding means the scaffold height should not exceed three times the base width. This ensures stability.
How Do You Erect Scaffolding Step By Step?
To erect scaffolding, ensure ground stability. Assemble base plates, attach frames, install cross braces, secure planks, and double-check all connections. Always follow safety guidelines.
How Would You Properly And Safely Set Up Scaffolding?
Ensure the ground is level and firm. Assemble scaffolding according to the manufacturer’s guidelines. Secure all components tightly. Install guardrails and toe boards for safety. Regularly inspect for any damages or instability.
Conclusion
Setting up scaffolding requires care and attention. Always follow safety guidelines. Use quality materials to ensure stability. Double-check connections and ensure proper weight distribution. Keep tools and materials organized on the scaffold. Inspect regularly for wear and tear. Proper setup prevents accidents and improves efficiency.
Remember to work with a team for safety. Communicate clearly with each other. A well-set scaffold supports your work and safety. Learning the basics helps everyone on site. Stay informed and practice often. Your safety depends on it.