Putting up scaffolding might seem like a daunting task. But with the right guidance, it becomes manageable and safe.
Scaffolding is essential for various construction and renovation projects. It allows workers to reach high places and ensures their safety while working. Whether you’re a DIY enthusiast or a professional, knowing how to put up scaffolding properly is crucial. This guide will walk you through the essential steps.
By following these instructions, you can set up scaffolding safely and efficiently. Ready to learn more? Let’s dive in and make this task easier for you.
Safety Precautions
Ensure safety by securing a stable base before assembling scaffolding. Always wear a helmet and non-slip shoes. Regularly check for loose parts to prevent accidents.
Putting up scaffolding is crucial for any construction task, but safety should always be your top priority. Every year, accidents happen due to neglecting proper safety measures. You don’t want to be the person who learns the hard way. Whether you’re a seasoned builder or a DIY enthusiast, ensuring your safety on scaffolding starts before you even set foot on it. Let’s dive into the essential precautions you should never overlook.Essential Safety Gear
Before stepping onto scaffolding, make sure you’re equipped with the right gear. Hard hats protect your head from unexpected falls or flying debris. Safety harnesses, especially when working on high scaffolding, can prevent life-threatening falls. Non-slip footwear keeps you steady even if the scaffold is wet or slippery. Have you ever skipped wearing gloves because they felt cumbersome? Don’t make that mistake. Gloves provide grip and protect your hands from sharp edges and splinters. Embrace each piece of gear as your personal safety armor. It’s much better to feel slightly overdressed than underprepared.Common Hazards
Understanding potential hazards is as crucial as having the right gear. Uneven ground can destabilize your scaffolding, leading to dangerous collapses. Always ensure the surface is level and solid before setting up. Weather conditions can be unpredictable. Windy days might seem perfect for work, but strong gusts can make scaffolding sway. Consider postponing your task if the weather seems risky. Ever seen scaffolding overloaded with materials? That’s a recipe for disaster. Exceeding weight limits can weaken the structure, causing it to give way unexpectedly. Know the limits and stick to them. Have you thought about the importance of regular inspections? Checking for loose bolts or damaged planks can save you from potential accidents. Make it a habit to inspect your scaffolding daily. Do these precautions feel overwhelming? Remember, they’re not just rules—they’re your lifeline. Prioritize safety, and you’ll not only protect yourself but also set an example for others. What measures will you take to ensure your scaffolding setup is secure?Choosing The Right Scaffolding
Choosing the right scaffolding ensures safety and efficiency in your project. Many types of scaffolding exist, each with specific features. Selecting the right type depends on your project needs and site conditions.
Types Of Scaffolding
There are several common scaffolding types. Each serves different purposes. Supported scaffolding is the most common and versatile. It rests on the ground and is stable for most projects. Suspended scaffolding hangs from above using ropes or wires. It’s ideal for tall buildings or hard-to-reach areas. Rolling scaffolding comes with wheels for easy movement. It’s useful for large areas where repositioning is frequent. Single scaffolding suits brickwork. It uses ledgers and putlogs for support.
Factors To Consider
Several factors influence scaffolding choice. First, consider the height of your project. Higher projects may need suspended scaffolding. Next, assess the ground conditions. Uneven ground may require adjustable scaffolding. Also, consider the load capacity. Heavy materials need stronger scaffolding. Weather conditions matter too. Windy areas require stable structures. Finally, think about the ease of assembly. Quick assembly saves time and labor.
Preparing The Site
Preparing the site is the first and most crucial step in putting up scaffolding. Ensuring the area is ready helps prevent accidents and ensures a smooth setup process.
Site Inspection
Start by inspecting the site thoroughly. Look for hazards such as uneven ground or obstacles. Check for overhead power lines or any other potential dangers. Document any issues and address them before proceeding.
Clearing The Area
Next, clear the area where you plan to erect the scaffolding. Remove any debris, tools, or materials that could cause tripping or falling. Ensure the ground is firm and level. If the soil is soft, consider using base plates or mudsills to provide a stable foundation.
Mark the boundaries of the scaffolding area with cones or tape. This keeps the work zone safe and organized. Ensure everyone on-site knows to keep the area clear during the scaffolding setup.
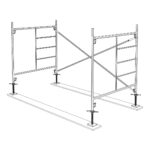
Assembling The Base
Assembling the base of a scaffold is a critical task. It ensures stability and safety. A well-constructed base lays the foundation for the entire structure. This section will guide you through the essential steps. Let’s focus on two main aspects: foundation setup and securing the base.
Foundation Setup
The foundation is the first step in scaffold assembly. Start by choosing a firm, level surface. Ensure the ground is solid and free from debris. Use a spirit level to check the ground’s evenness. A stable foundation prevents tipping and accidents. In cases of uneven ground, use base plates and adjustable legs. These tools help create a flat surface. Always double-check the level to ensure safety.
Securing The Base
Once the foundation is ready, secure the base. Position the base plates correctly. They distribute weight evenly. Attach the vertical frames to the base plates. Ensure the frames are plumb and straight. Use locking pins to secure the joints. This prevents movement and enhances stability. Check each connection carefully. Tight and secure connections are vital for safety. Regularly inspect the base during use. This ensures ongoing stability and safety.
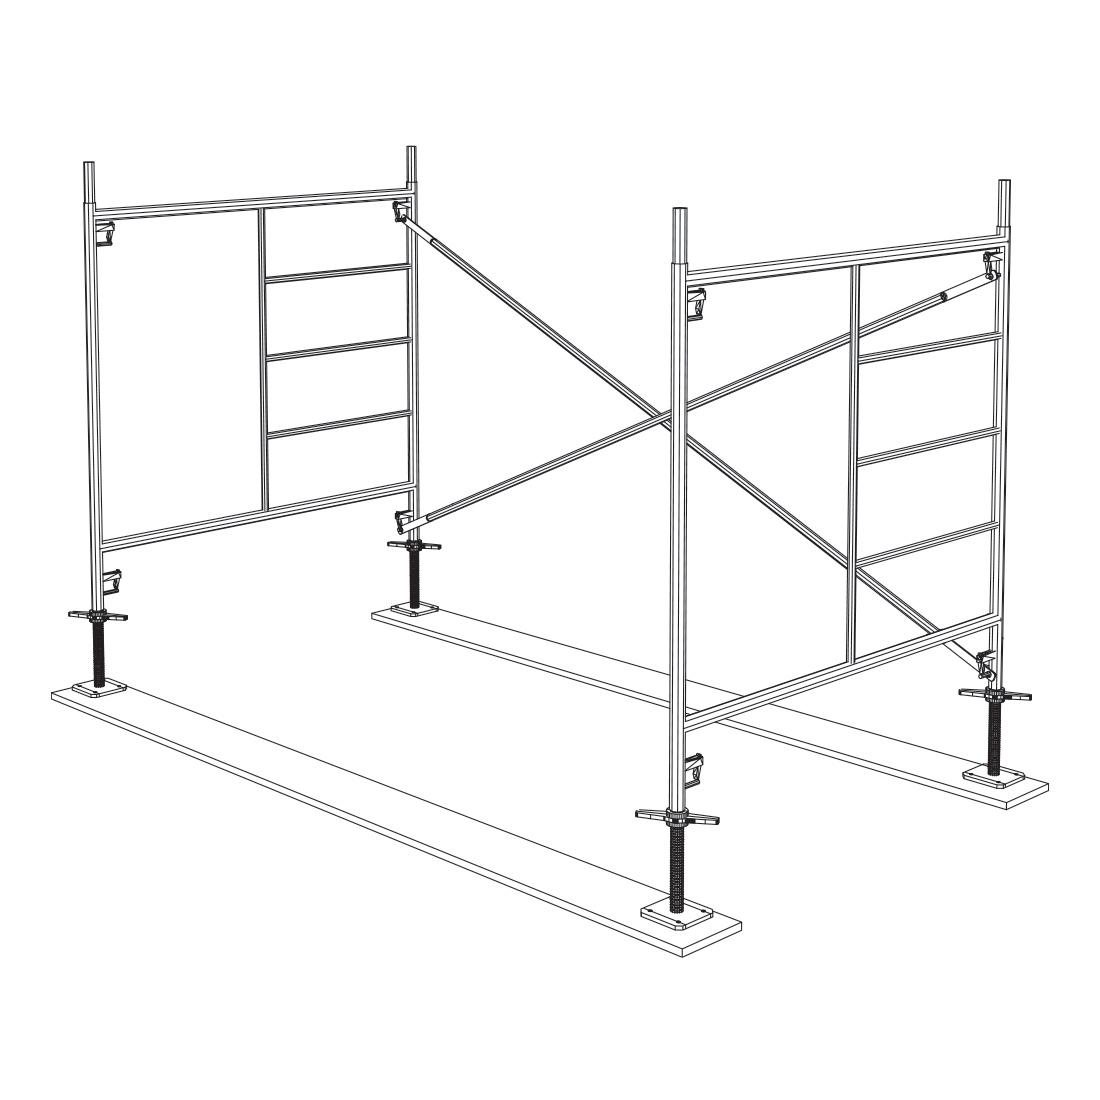
Building The Structure
Building the structure of scaffolding requires careful attention and precision. This process ensures stability and safety for workers. The scaffolding must be strong and secure before any work begins. Let’s explore the key steps involved in this critical phase.
Erecting Uprights
The first step is erecting the uprights. These are the vertical poles that support the scaffold. Position each upright on a firm, level surface. This prevents wobbling and ensures stability. Use a spirit level to confirm they’re perfectly vertical. Secure them tightly to the base plates.
Spacing is crucial. Keep them evenly spaced for balanced weight distribution. This avoids excessive pressure on any single upright. Check all connections. They must be solid and secure. Safety checks are essential at this stage.
Installing Cross Braces
Cross braces provide horizontal support. They connect the uprights and prevent swaying. Install them by securing each brace to adjacent uprights. This forms a stable framework.
Ensure the braces form right angles with the uprights. This strengthens the entire structure. Use locking pins or clamps for a firm hold. Tighten all fittings to avoid movement.
Regular checks are necessary. Inspect the braces for signs of wear or damage. Replace any compromised parts immediately. This ensures ongoing safety and stability.

Credit: www.constructionnews.co.uk
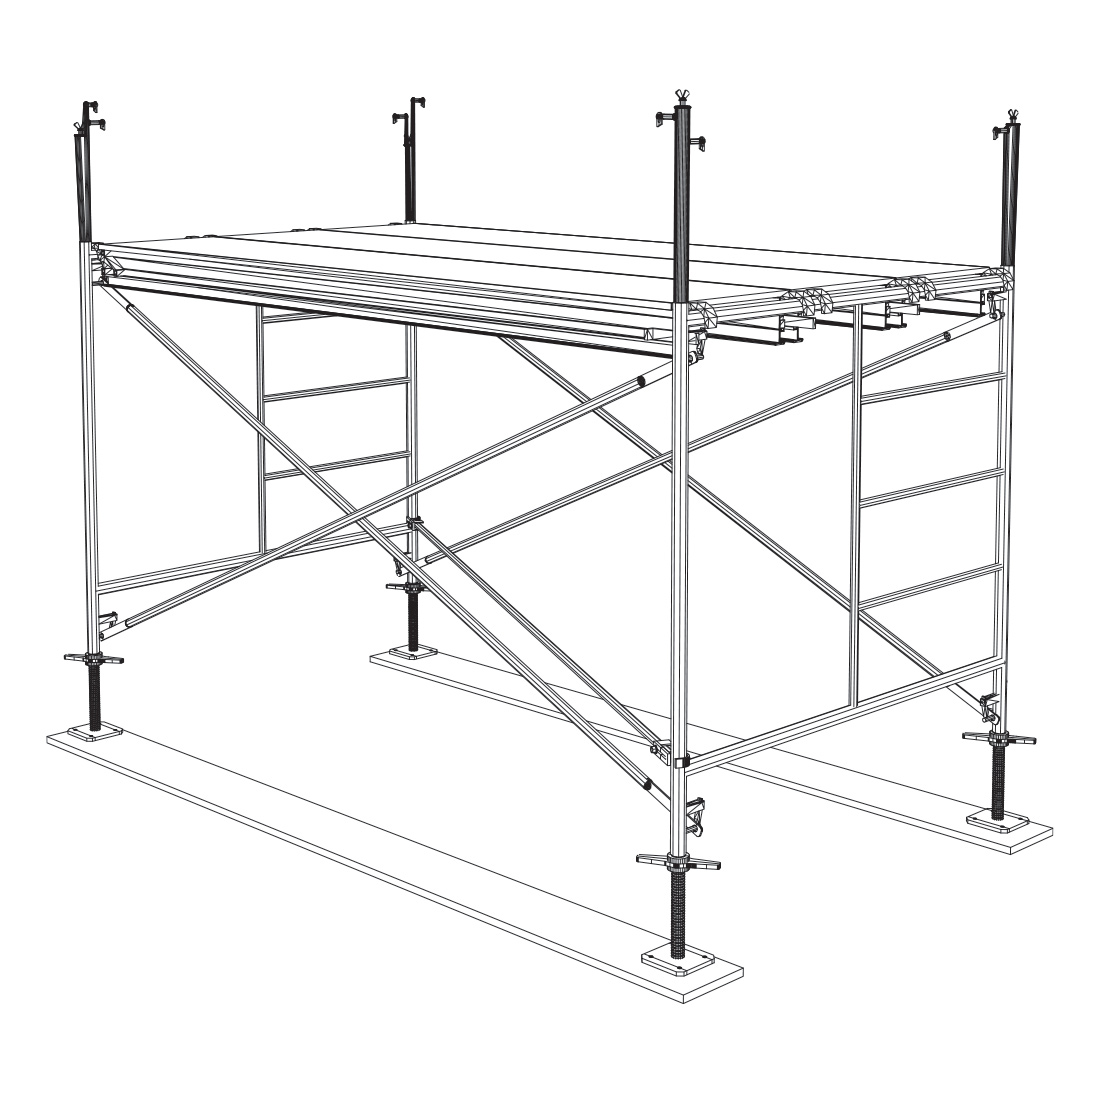
Adding Platforms And Guardrails
Adding platforms and guardrails is vital for scaffolding safety. These components ensure stability and protection for workers. Proper installation prevents accidents and promotes efficiency on-site. Understanding each step in the process is crucial.
Platform Placement
Place platforms securely on the scaffolding. Ensure they fit snugly without gaps. Check that each platform is level. Uneven surfaces can cause tripping hazards. Use planks or boards designed for scaffolding. This ensures durability and support. Avoid using damaged materials.
Arrange platforms to cover the entire work area. This provides a stable base for workers. Double-check the connections between platforms. Loose connections can lead to collapse. Secure platforms with clamps or ties. This prevents movement during use.
Guardrail Installation
Guardrails are essential for fall prevention. Install them on all open sides of the scaffolding. Ensure guardrails are at the correct height. Typically, they should be between 38 and 45 inches. This height provides adequate protection.
Use strong and reliable materials for guardrails. Metal or heavy-duty plastic works well. Ensure guardrails are fastened tightly. Loose rails can become dangerous. Regularly inspect guardrails for wear and tear. Replace any damaged sections immediately.
Add toe boards along the edges. These prevent tools from falling off the scaffold. Toe boards should be at least four inches high. They add another layer of safety. Complete the installation by checking all connections. A secure setup ensures worker protection.
Inspecting The Scaffolding
Inspecting the scaffolding is crucial before any construction project begins. Ensuring safety and stability is a top priority. Proper inspection prevents accidents and enhances efficiency. This section guides you through essential inspection steps.
Structural Integrity Check
Examine the scaffolding for any visible damage. Look for cracks or bends in the metal parts. Ensure all joints are tightly connected. Check the base supports for stability. Ensure the ground is firm and level. Avoid soft or uneven surfaces.
Safety Features Verification
Confirm that guardrails are properly installed. They must be secure and at the correct height. Inspect the ladders for stability and secure attachment. Ensure toe boards are in place to prevent tools from falling. Verify that safety harnesses are available if required.
Credit: www.metaltech.co
Maintenance And Adjustments
Regular scaffolding maintenance and adjustments are vital. Ensure all parts are secure and in proper position for safety. Regular checks help prevent accidents.
Putting up scaffolding is a task that demands attention not only during the setup but also throughout its use. Once your scaffolding is in place, regular maintenance and adjustments are crucial. Neglecting these can lead to safety hazards and inefficiencies. Ensuring the scaffolding remains stable and secure is a continuous process that requires diligence and care.Routine Checks
Routine checks are essential for maintaining scaffolding safety. Begin by examining all the connections and joints to ensure they’re tightly secured. Loose fittings can be dangerous. Inspect the planks and platforms for any signs of wear or damage. Even minor cracks can compromise stability. Regularly check the scaffolding’s alignment. Over time, structures can shift, affecting balance and safety.Necessary Adjustments
Adjustments are sometimes needed to keep scaffolding safe and efficient. Tighten any loose bolts or screws you notice during your checks. It’s better to address these issues promptly. Consider the environment where the scaffolding is set up. Weather conditions might require you to reposition or secure certain parts more firmly. Height adjustments may be necessary as your project progresses. Ensure all changes are made systematically to maintain stability. Maintaining scaffolding isn’t just about safety; it’s about ensuring your project runs smoothly. Have you ever found yourself wasting time due to an unstable platform? These adjustments can prevent that. Keep a checklist for routine checks and adjustments. This simple tool can save you time and effort. What steps will you take today to ensure your scaffolding remains secure?
Credit: www.wikihow.com
Frequently Asked Questions
How To Put Up Scaffolding For Beginners?
Start by gathering necessary tools and safety gear. Assemble the base, ensuring it’s level and secure. Attach frames and braces, checking stability. Install planks, ensuring they’re locked in place. Use guardrails for safety. Always follow manufacturer guidelines.
What Is The 3 To 1 Rule For Scaffolding?
The 3 to 1 rule for scaffolding ensures stability by maintaining a height-to-base width ratio of three to one. This prevents tipping and enhances safety during construction or maintenance work. Always follow manufacturer’s guidelines for setup and usage.
Can You Put Up Your Own Scaffolding?
Yes, you can put up your own scaffolding if trained. Ensure it complies with safety regulations and guidelines.
How Do You Go Up Scaffolding?
Use a ladder or staircase to access the scaffolding. Always maintain three points of contact. Ensure the scaffolding is stable and secure before climbing. Wear appropriate safety gear, including a hard hat and non-slip shoes. Follow all safety guidelines to prevent accidents.
Conclusion
Putting up scaffolding is essential for construction safety. Follow the steps carefully. Always prioritize safety and stability. Use proper tools and materials. Double-check connections and supports. Regularly inspect the scaffolding for any issues. Keep the work area clean and organized.
Communicate with your team clearly. With these tips, scaffolding becomes manageable. Stay safe and efficient on your construction site.